The legal pages your store needs
Write your policies in Shopify (refund, privacy, terms, legal notice) and display them in the Story Theme footer.
An online store has to give its customers certain information: who is selling, how their data is used, how returns and refunds work. Shopify groups these texts under Policies, and the Story Theme automatically displays them at the bottom of every page.
Fill in your policies in Shopify
- In your Shopify admin, open Settings > Policies.
- Open each policy and write its text. For some of them, Shopify offers a starting template: read it and adapt it to your store (name, address, time limits, return fees).
- Save.
The policies to fill in first:
| Policy | What it covers |
|---|---|
| Refund policy | Return window and conditions, who pays for returns, refund timeline |
| Privacy policy | The data you collect, how you use it, the customer's rights |
| Terms of service | Your terms and conditions of sale: prices, ordering, payment, delivery, warranties |
| Shipping policy | Shipping zones, delivery times and costs |
| Contact information | Your business name, address, contact email and phone number |
| Legal notice | The site publisher, its company registration, the hosting provider |
Each policy you fill in gets its own page on your store (for example /policies/refund-policy) and a link at the bottom of the checkout page.
Generate your legal notice
For a store based in France, a legal notice is mandatory. The free Legal notice generator, with no sign-up required, builds the text from a form: publisher (company or sole trader), hosting provider (one button pre-fills the Shopify part), contact, publication director and consumer mediator.
- Fill in the form and copy the generated text.
- Paste it into the Legal notice policy in Settings > Policies, or into a dedicated page (see below).
- Check every detail: the tool assembles what you enter, it doesn't verify it.
The generator doesn't write your terms and conditions of sale. More details in Free tools.
Show the links in the footer
The Story Theme footer includes a Policy links block that automatically lists the policies you've filled in.
- Open Online Store > Themes > Edit theme.
- In the sidebar, under Footer, select the Policy links block (usually on the last row, next to the copyright).
- Make sure Show store policies is checked (it is by default).
- To add other pages (a separate terms and conditions page, a withdrawal form), create a menu that contains them, then choose it in Additional links.
- If Shopify's cookie banner is active on your store, check Show a cookie preferences link so your visitors can change their choice.
- Adjust the look if needed (Separator, Alignment, Text size), then click Save.

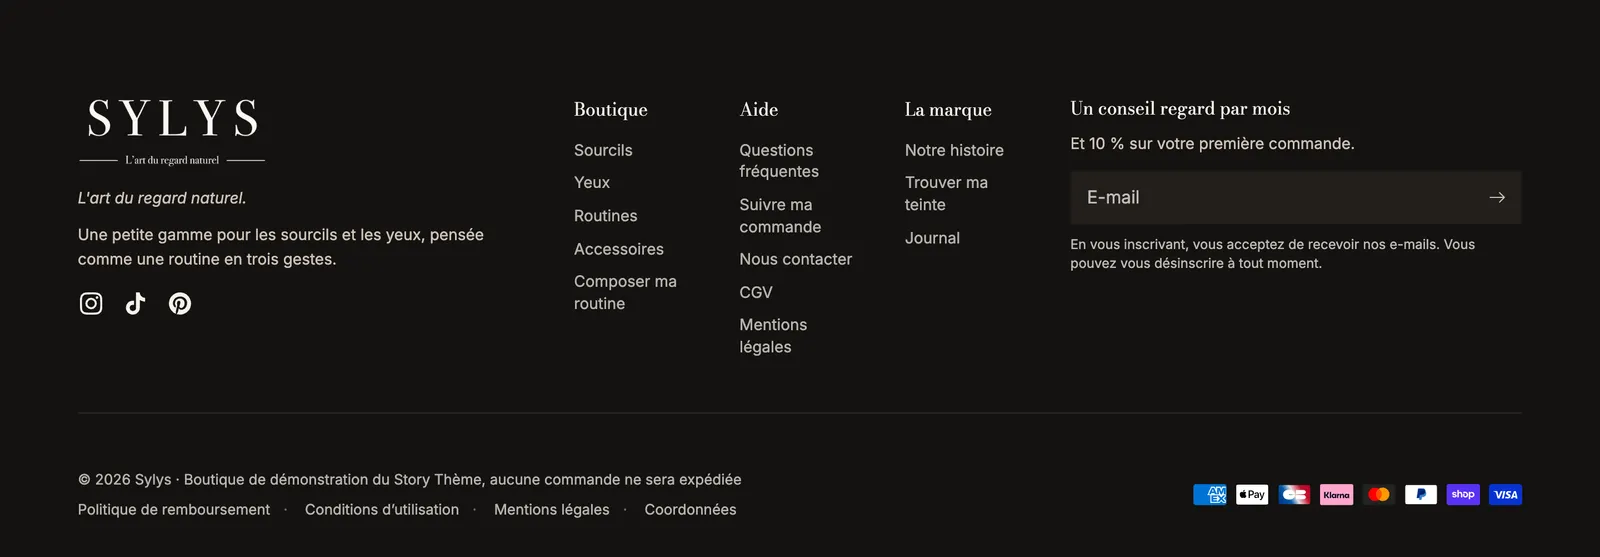
If a link doesn't show up, the matching policy is usually empty in Settings > Policies.
Publish a separate legal page
Would you rather have a "Terms and conditions" or "Legal notice" page in addition to the policies, for example to put it in a footer menu?
- Create the page in Online Store > Pages and paste the text into it.
- Add it to the footer menu or to the menu chosen in Additional links.
The steps are detailed in Create a page and add it to the menu.