
Story Studio: create your brand and your first visuals
Create your brand in Story Studio, fill in the Brand Kit, add your products and customer avatars, then generate your first product visuals.
Story Studio is the artificial intelligence workshop in your member area. Starting from your brand, your products and your typical customers, it generates product visuals, Meta ads and a first draft of your store. This article covers the foundations and the image generator; ads and the Store Builder have their own article.
Open Story Studio
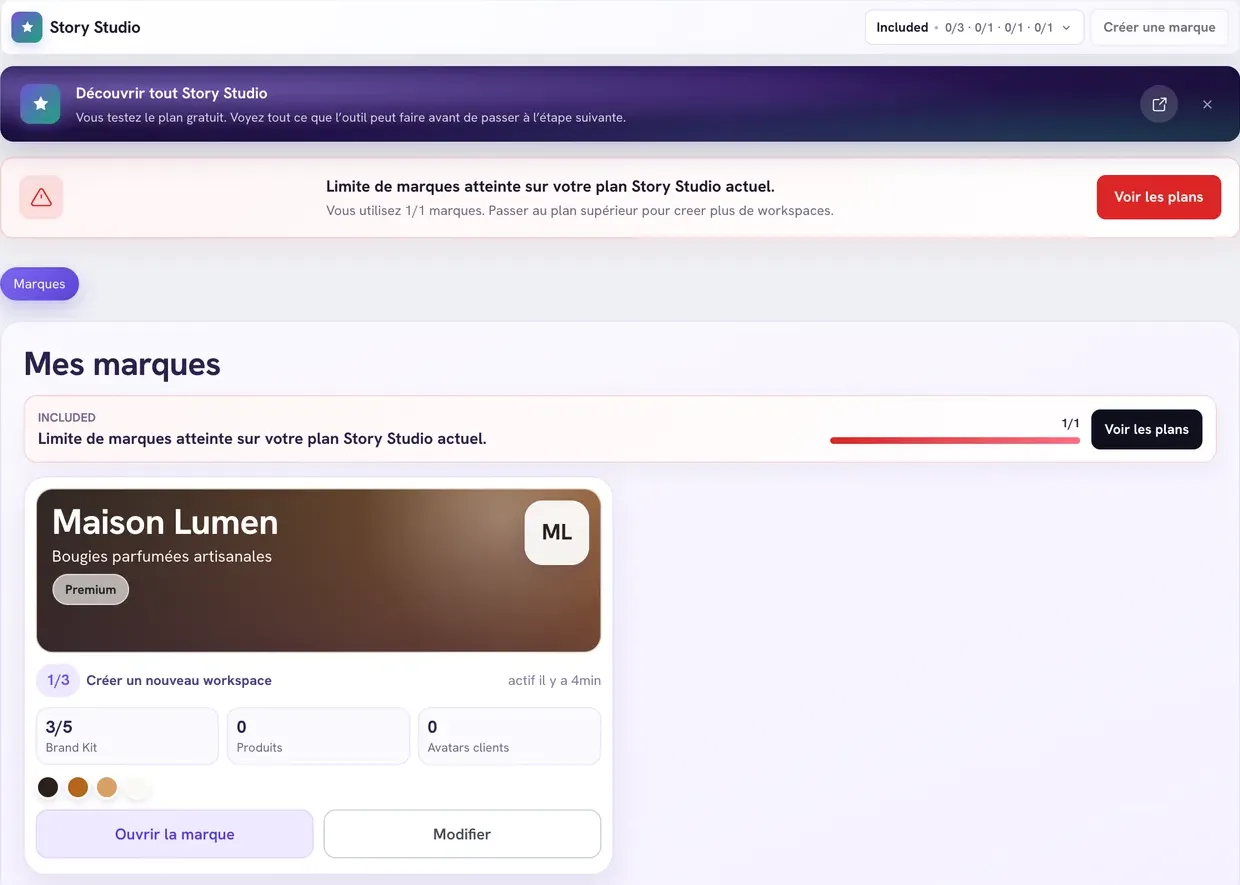
In your member area sidebar, click Tools > Story Studio (marked with the "IA" badge). You land on My brands, the list of your brands.
At the top of the screen, the plan button (for example Included) shows your usage for the month; click it to see the details and get to View plans. The Create a brand button starts a new brand.
The foundations in three steps
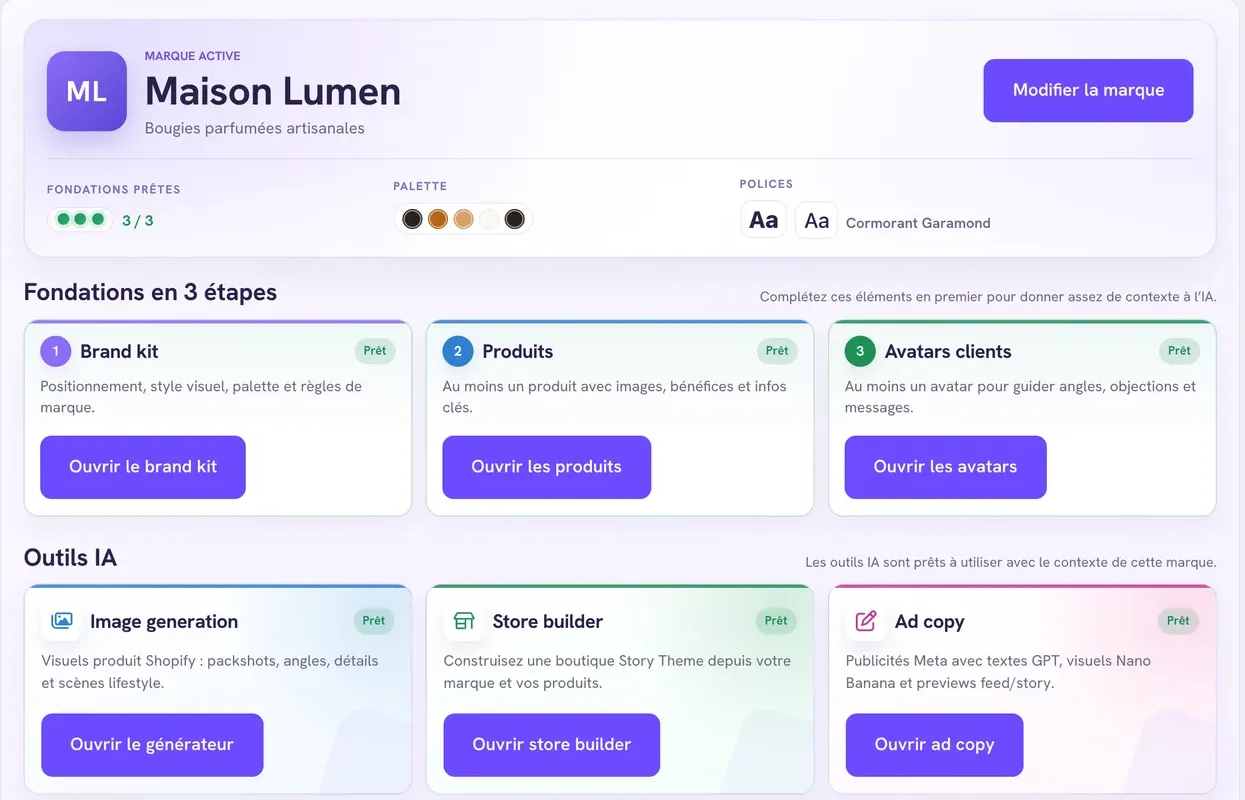
Each brand has its own Workspace. It shows the Foundations in 3 steps: the Brand kit, Products and Customer avatars. Each one is labeled Ready or To complete. The generation tools (AI tools) unlock when all three are ready: this context is what lets the AI produce visuals that are true to your brand.
1. Fill in the Brand Kit
- Click Create a brand (or Edit under an existing brand): the Brand Kit opens.
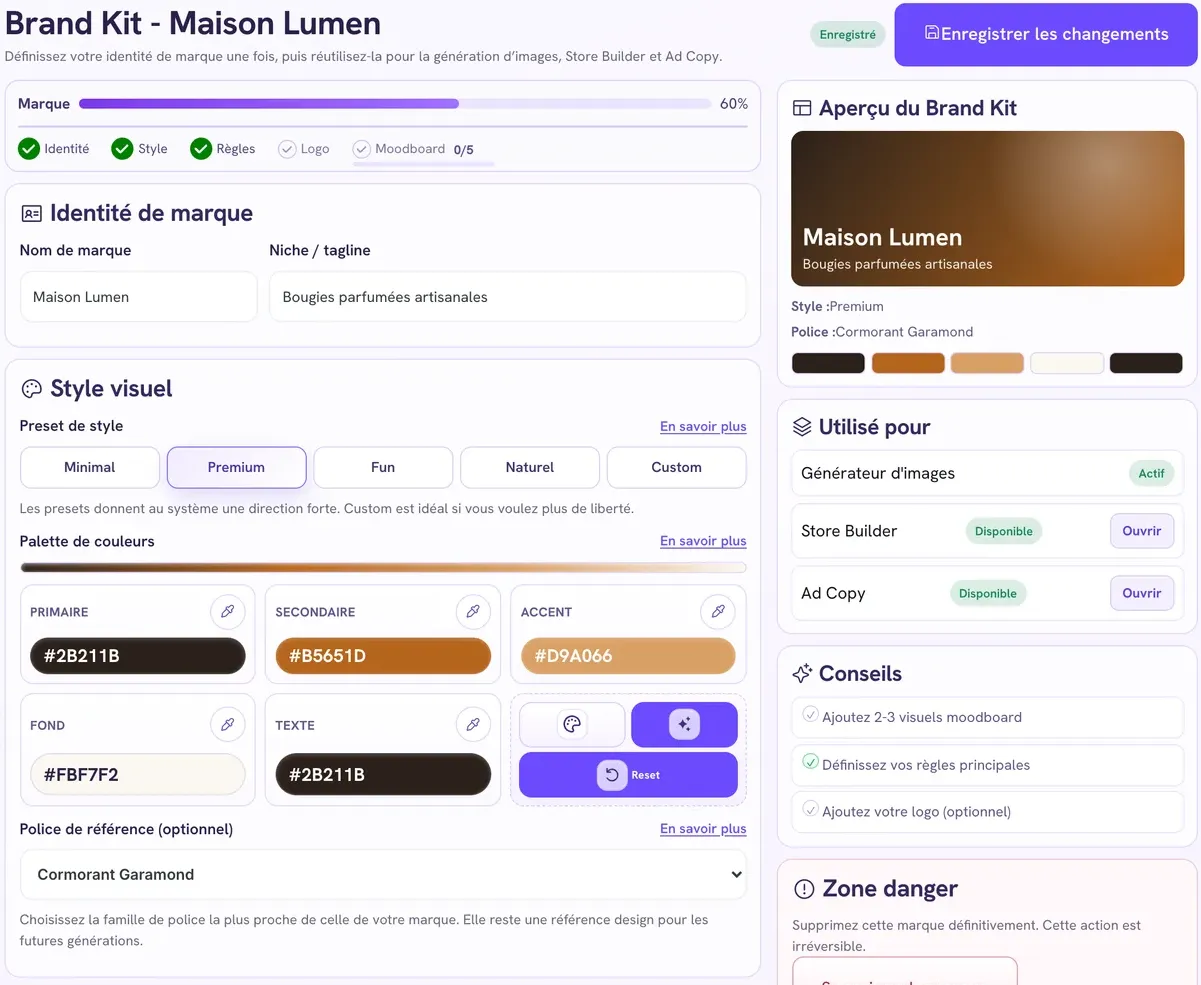
- Brand identity: enter the Brand name and the Niche / tagline (what you sell, in one sentence).
- Visual style: choose a Style preset: Minimal, Premium, Fun, Natural, or Custom to name your own art direction.
- Palette colors: five colors (Primary, Secondary, Accent, Background, Text). Enter your codes, or let Story Studio suggest a palette from your primary color or with AI.
- Reference font (optional): the family closest to your brand's font.
- Brand rules: check the rules to follow on every image (product centered, clean background, no text on image…) and add your own instructions in Guidelines (advanced).
- Brand assets: upload your logo and up to 5 inspiration images (moodboard), in PNG, JPG or WebP.
- Click Save changes.
The Brand Kit counts as ready as soon as 3 of these 5 items are filled in: the niche, the style, a named font, the logo, the moodboard.
2. Add your products
- From the workspace, open Products, then click Add product.
- Enter the name and add 1 to 3 images of the product (5 MB max each).
- Fill in the description, the benefits, the problems solved, any variants and useful details.
- Click Save product.
The sharper and better lit your source photos, the better the generated visuals.
3. Create your customer avatars
A customer avatar is a portrait of a typical customer: their age, their problem, what they want, what makes them hesitate. Story Studio uses it to choose scenes, emotions and messages.
- Open Customer avatars.
- Click Generate 3 avatars with AI, choose the Target country, then start the generation. You can also click Create avatar manually.
- Review each avatar (Profile, Problems, Goals, Objections, Marketing tabs) and correct it if needed.
A brand can keep up to 10 avatars, but only three are used: one Primary, one Secondary and one Niche. The others stay as drafts.
Generate your first visuals
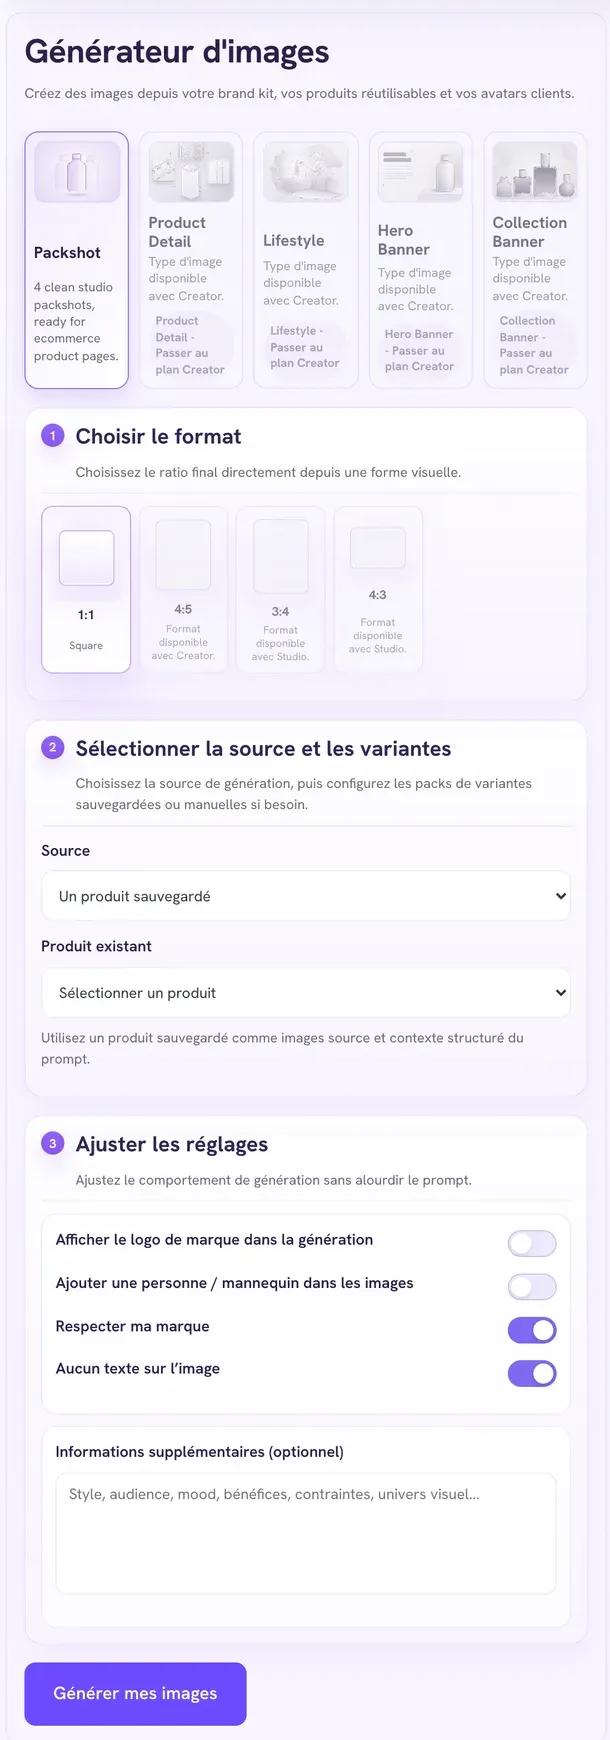
Once the foundations are ready, click Open image generator in the workspace.
- Choose format: the ratio of the final image (square 1:1, portrait 4:5, vertical 9:16, landscape 16:9 depending on your plan).
- Select source & variants: General brand visual, One saved product, Several saved products or Upload manually your reference images. Optionally choose the Target avatar.
- Choose the type of visual: packshot (product alone, neutral background), product detail, lifestyle (product in use), home page banner or collection banner, depending on what your plan unlocks.
- Adjust settings: show the logo, add a person, Creativity level, Respect my brand, No text on image, additional information.
- Click Generate my images.
The generation runs in the background. The results are stored in Generation folders: open a folder to download each image, or all of them at once with Download all (ZIP). A completed generation uses one credit, however many images it produces.
Plans and quotas
Monthly quotas renew on your subscription's anniversary date for paid plans, and on the 1st of the month for the Included plan. Prices include VAT; the annual subscription costs the same as 10 months.
| Included | Creator | Growth | Studio | |
|---|---|---|---|---|
| Monthly price | Free | €19 | €39 | €89 |
| Annual price | — | €190 | €390 | €890 |
| Brands | 1 | 3 | 10 | 25 |
| Products per brand | 1 | 5 | 15 | 50 |
| Avatar generations / month | 3 | 20 | 50 | 100 |
| Image generations / month | 1 | 8 | 20 | 50 |
| Store Builder / month | 1 | 5 | 15 | 40 |
| Ads Copy / month | 1 | 20 | 50 | 120 |
| Ad templates unlocked | 1 | 5 | 20 | 40 |
| Image types | Packshot | Packshot, product detail, lifestyle | All | All |
| Image formats | 1:1 | 1:1, 4:5 | 1:1, 4:5, 9:16, 16:9 | All |
Each brand can have up to 10 avatars, whatever the plan.
To change plans, click View plans: the pricing page shows your current plan, your usage and the four plans, billed monthly or annually.
- Upgrading takes effect right away; the amount is prorated for the time remaining.
- Downgrading is scheduled for the end of your current period; you keep your current quotas until then.
- If a payment fails, your account temporarily goes back to the Included plan; a banner invites you to open the billing portal to settle the payment.
When a quota is reached, the generation is refused with a message showing your current plan and the recommended plan. Options reserved for a higher plan are marked "Available with" followed by the plan name.